
Apply photo filters on Mac
Give photos a look — warm, cool, vivid, moody, vintage, black & white — with fade, grain and vignette.
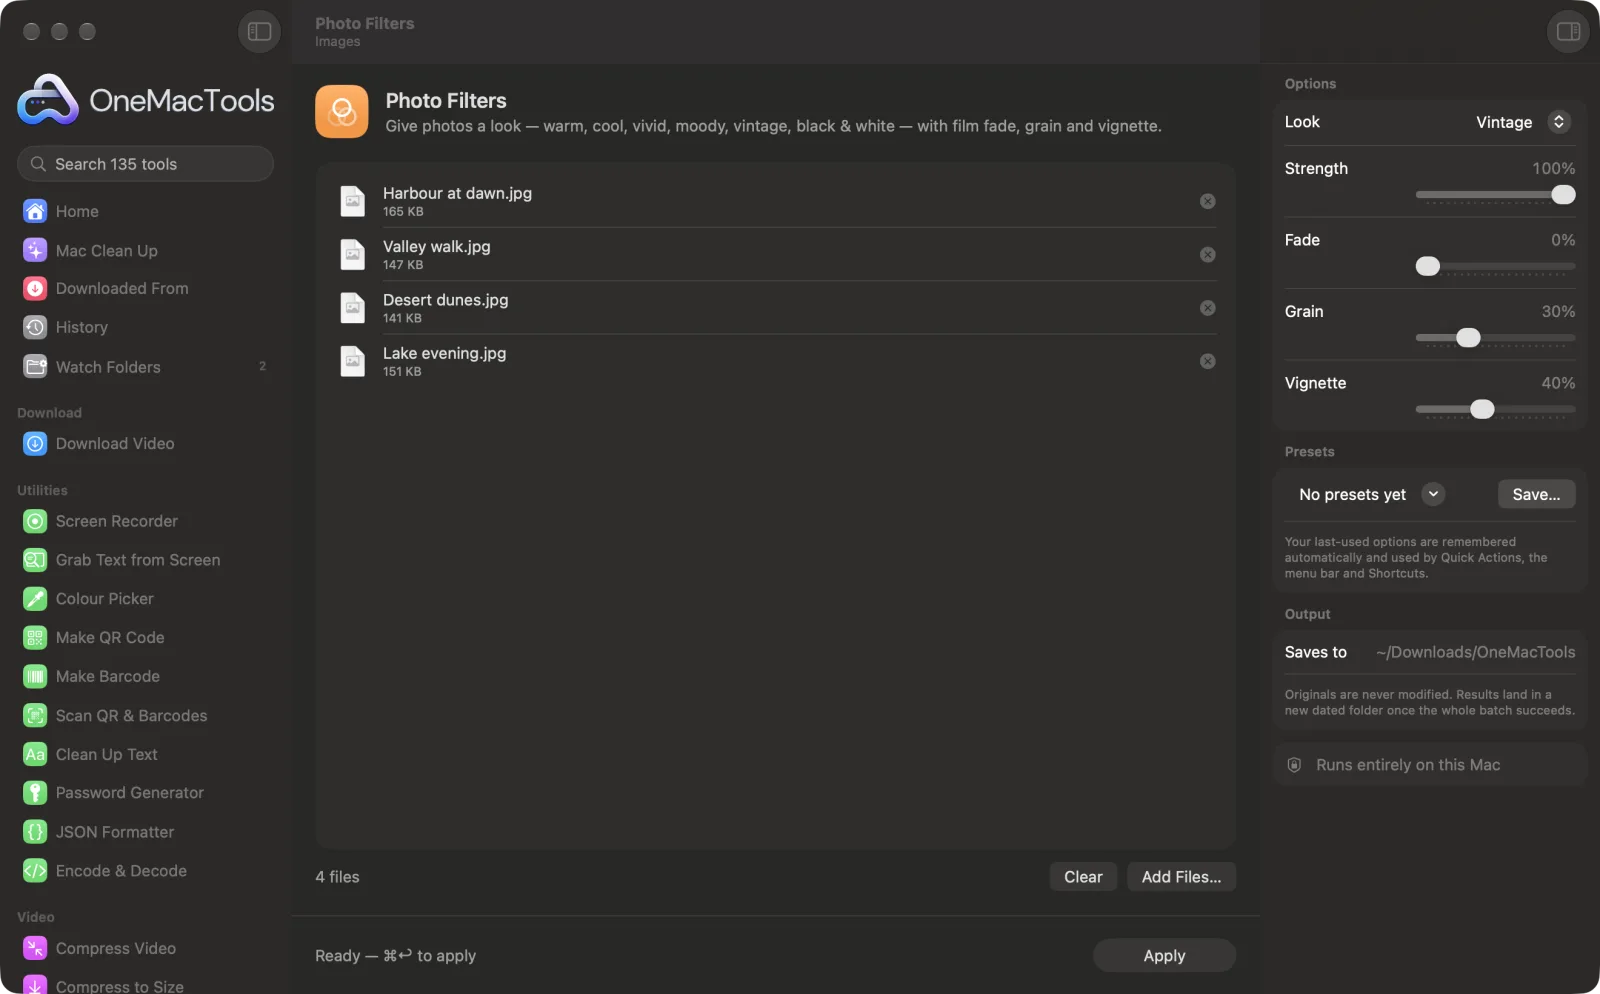
Photo Filters on a Mac
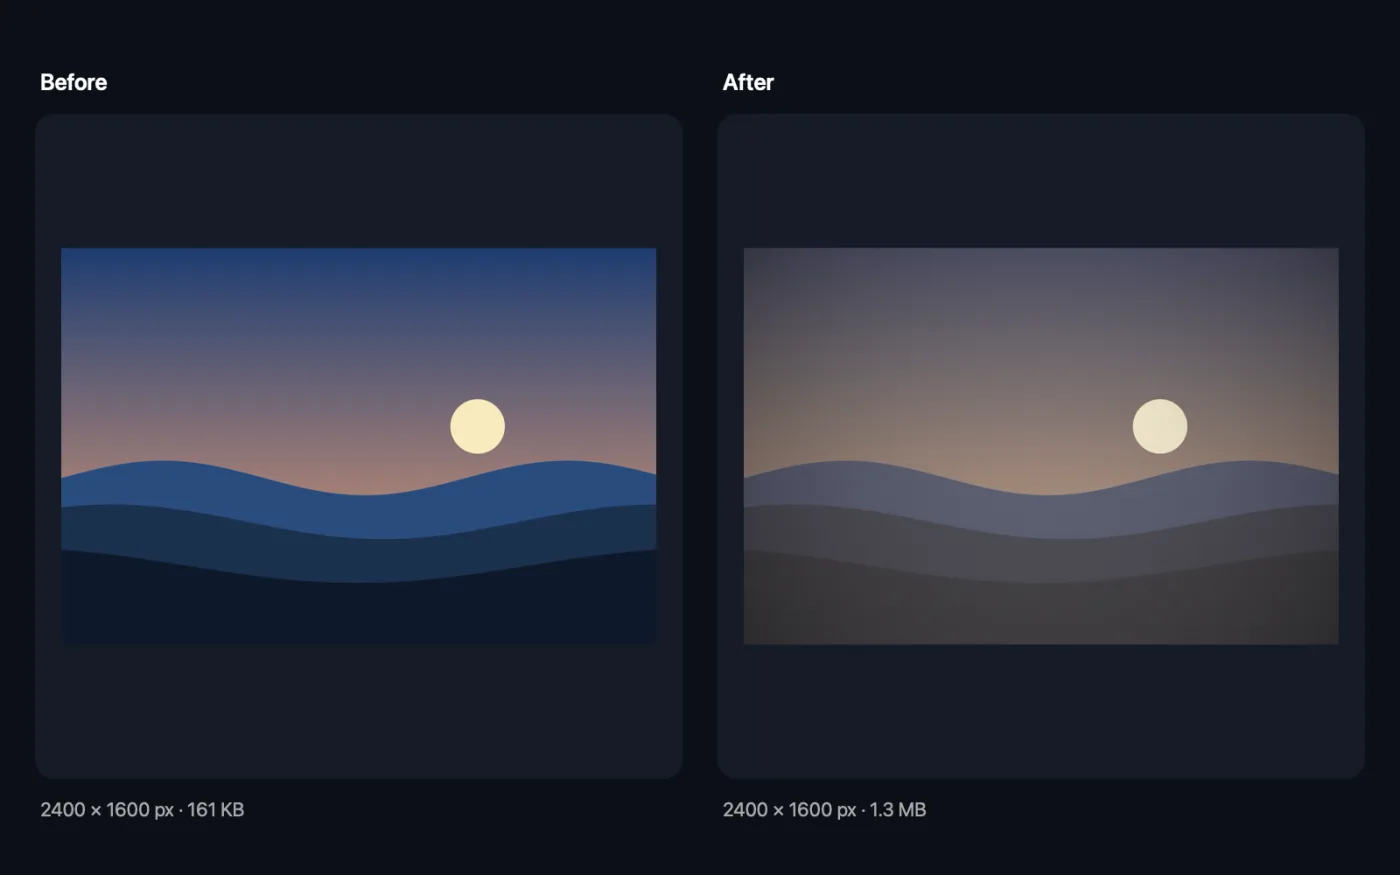
Screenshots from the app, using sample files.
How to use Photo Filters
- 1
Drop your photos
Add one photo or a whole set. The same settings are applied to every one, so a set ends up with one consistent style.
- 2
Pick a look
Warm, Cool, Vivid, Moody, Vintage, Black & white, Noir, Film fade, Instant or Chrome, or None to use only the finishing touches.
- 3
Set the strength
Lower Strength to blend the look with the original photo for a subtler result.
- 4
Add fade, grain or vignette
These work with any look, or on their own with None.
- 5
Click Apply
Filtered copies are saved in a dated folder in Downloads › OneMacTools. Use the Preview (eye) button to compare, or Show in Finder.
What Photo Filters does
Pick a look and its strength, then add film fade to lift the blacks, film grain and a vignette. All of them work on their own too, and on a whole batch, so a set of photos gets a consistent style.
Great for
- Give a photo set one consistent style
- Make black-and-white prints
- Add a film look to social posts
Options explained
- Look
- The overall style: Warm, Cool, Vivid, Moody, Vintage, Black & white, Noir, Film fade, Instant, Chrome or None. Choose None when you only want fade, grain or a vignette.
- Strength
- Only shown when a look is chosen (not None). How much of the look is mixed in, from 0 to 100%; the default is 100%. Around 50–70% often looks more natural on portraits.
- Fade
- Lifts the blacks and softens contrast like faded film, from 0 to 100%. Off by default.
- Grain
- Adds fine film grain, from 0 to 100%. Off by default. The grain is random, so two runs won't be pixel-for-pixel identical.
- Vignette
- Darkens the edges to draw the eye to the centre, from 0 to 100%. Off by default.
Best practices
- Edit a whole set at once. Running every photo from one shoot through the same look and strength gives a gallery or feed a consistent feel.
- For black-and-white prints, compare Black & white with Noir: Noir has deeper contrast, Black & white is gentler.
- Keep the finishing touches light. A little fade (10–25%) and vignette (20–30%) usually reads as film; high values quickly look heavy.
- Grain hides noise in low-light phone photos, so a touch of it can make a dark photo look intentional rather than grainy by accident.
- Filter before you compress. Apply the look to the full-size photo first, then shrink it for the web with Compress Images.
Works with
- In
- JPEG, PNG, HEIC, TIFF, WebP and other images your Mac can open.
- Out
- A copy named with the look added, for example “beach warm.jpg”. It keeps the original's format where it can (JPEG, PNG, HEIC, AVIF or TIFF) and is saved as PNG otherwise.
- The copy doesn't carry over the original's camera details or location.
Questions about Photo Filters
How do I make a photo black and white on a Mac?
Drop it onto Photo Filters, choose Black & white or Noir as the Look and click Apply. Noir gives a darker, high-contrast result.
Can I apply the same filter to many photos at once?
Yes. Drop them all in together; every photo gets the same look, strength, fade, grain and vignette.
How do I make a filter less strong?
Lower the Strength slider. At 50% the result is halfway between your original photo and the full look.
How do I give a photo a vintage film look?
Choose Vintage or Film fade, then add some Fade to lift the blacks and a little Grain. A light Vignette finishes it off.
Can I add only a vignette or grain without changing the colours?
Yes. Set Look to None, then use the Fade, Grain and Vignette sliders on their own.
Will the filter reduce the photo's quality?
The photo keeps its full pixel size. JPEG and HEIC copies are saved at high quality, and PNG and TIFF copies are lossless.
Does Photo Filters upload my files?
No. Photo Filters runs entirely on your Mac, so your files never leave it and it works offline.
Will Photo Filters change my original files?
No. Results are saved as new files in a dated folder in Downloads › OneMacTools, and your originals are left exactly as they were unless you turn on an option that says otherwise.
What does Photo Filters need?
Just a Mac with macOS 26 or later. There's nothing else to install.
Do this next
Pad photos with an even white, black, coloured, blurred or transparent border.
Compress ImagesShrink photos for email and the web, with a live before-and-after preview.
Watermark ImagesAdd your name, © notice or logo to photos — in a corner or tiled across the whole image.
Related Images tools
Convert between PNG, JPEG, HEIC, AVIF and TIFF. Reads WebP, RAW and more.
Convert to WebPMake small, web-ready WebP images, lossy or lossless, with transparency kept.
Resize ImagesResize by longest edge, exact pixels, percentage, or print size in cm, mm or inches at the DPI you need.
Crop ImagesCrop to an aspect ratio or an exact area, or trim plain borders automatically — one photo or a whole folder.
Rotate & Flip ImagesTurn or mirror photos in one go.
Screenshot BeautifierPut screenshots on a gradient with padding, rounded corners and a soft shadow.

Photo Filters, plus 134 more.
One app. One price.
All 135 tools for $29, once. 14-day money-back guarantee.