
Crop a photo into a circle on Mac
Cut a round profile picture with a transparent surround, centred on the face automatically.
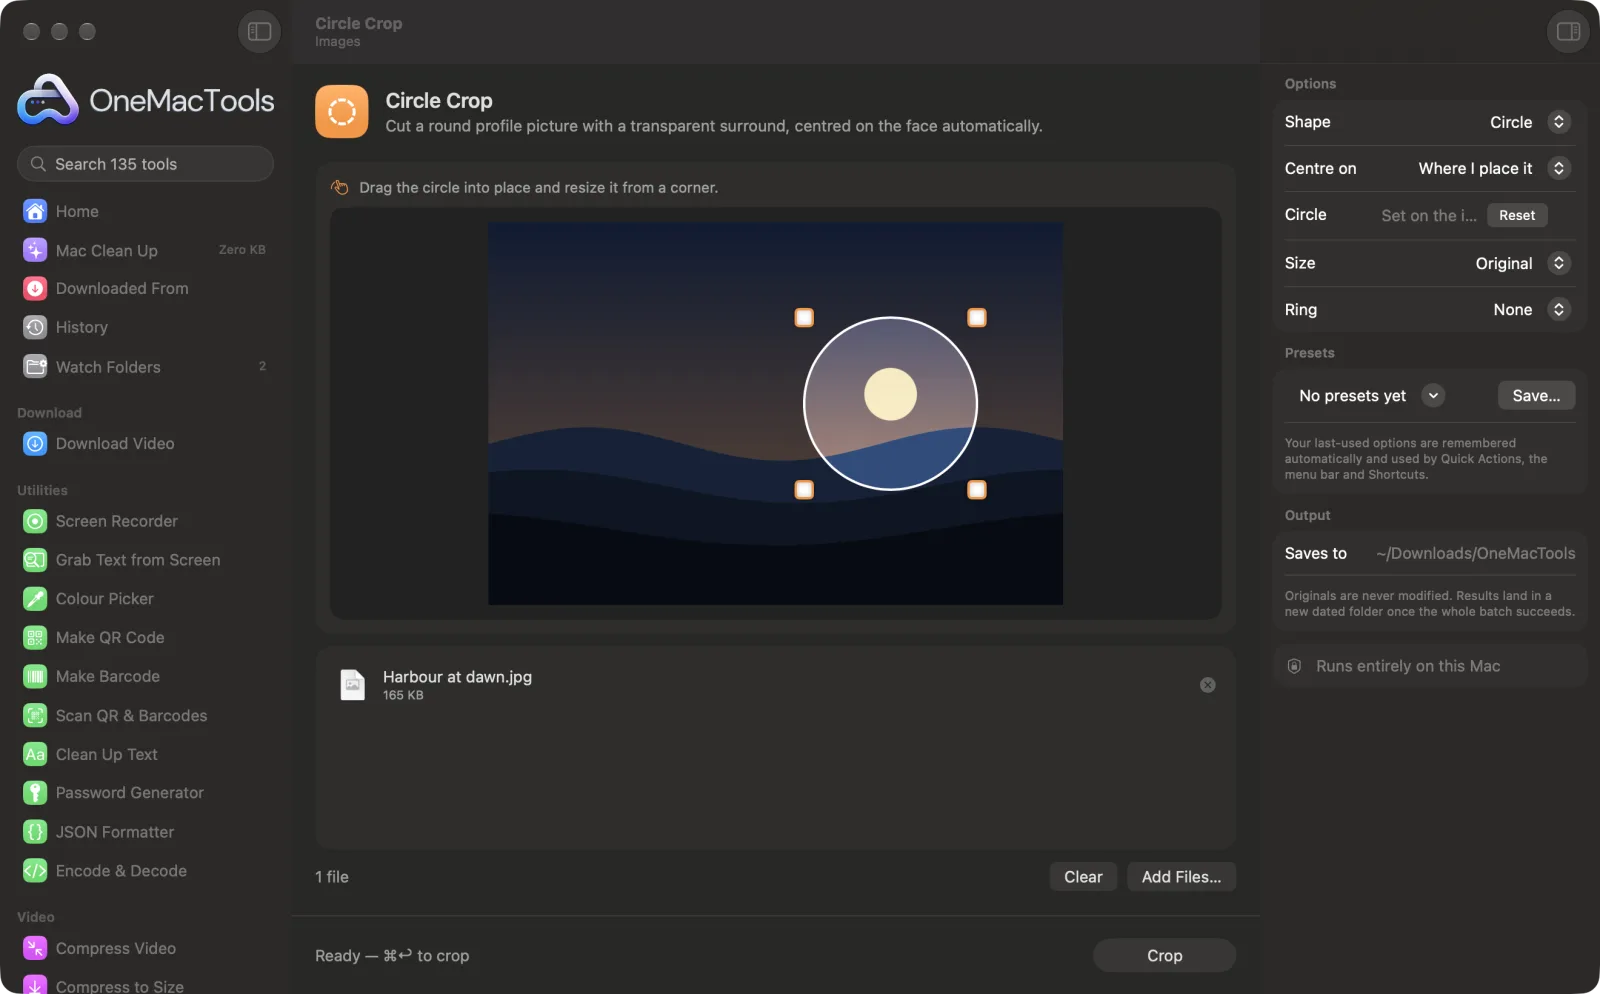
Circle Crop on a Mac
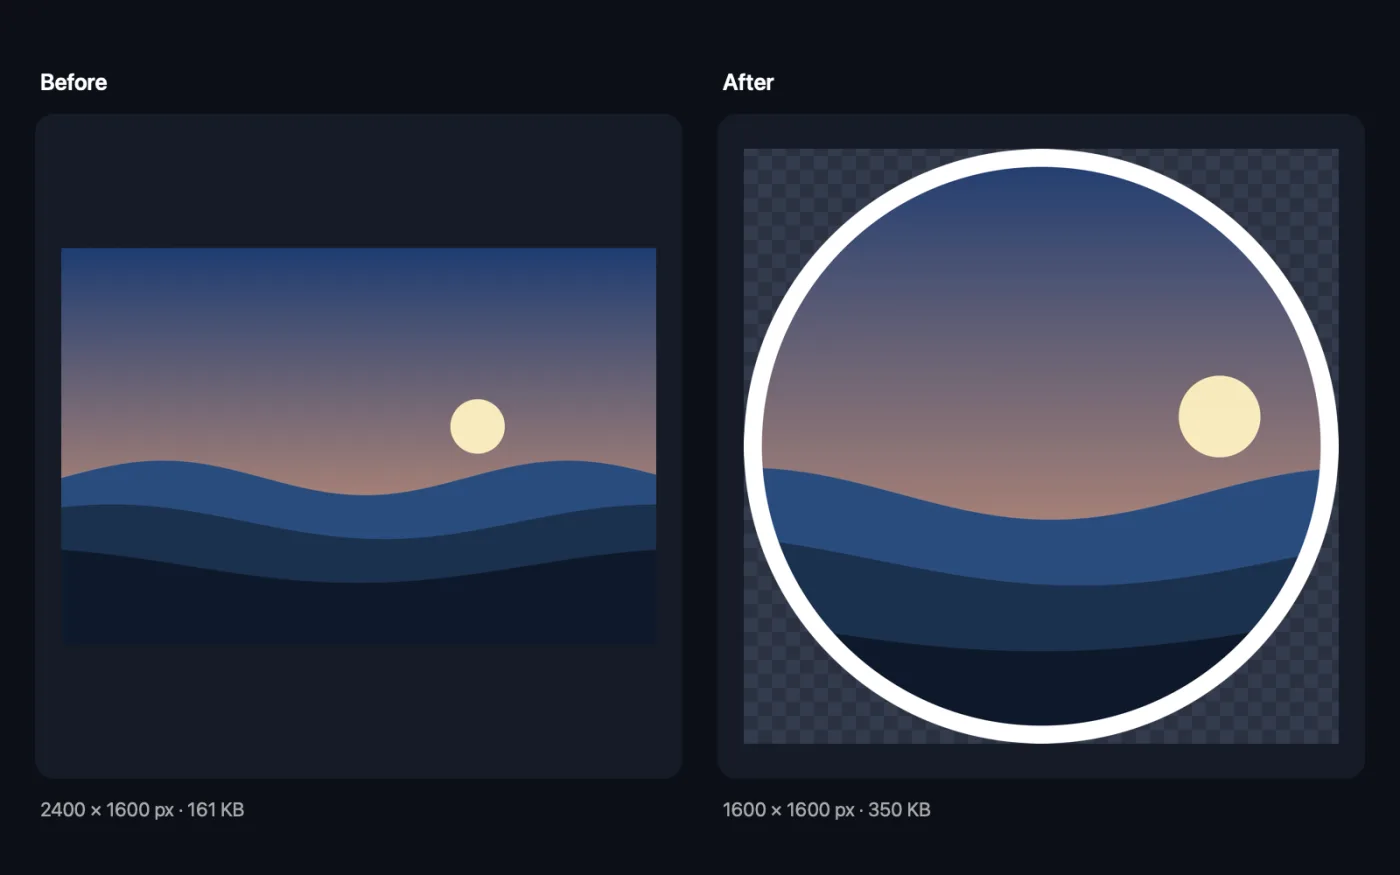
Screenshots from the app, using sample files.
How to use Circle Crop
- 1
Drop your photos
Add a portrait or a batch of team headshots.
- 2
Choose the shape
Circle for a round profile picture, or Oval to keep the photo's own proportions.
- 3
Frame the face
Leave Centre on set to the face and adjust how much room is left around it, or centre on the middle of the photo instead.
- 4
Pick the size and ring
Choose a size from 256 to 1024 px or keep the original, and add a white or black ring if you like.
- 5
Click Crop
Each photo is saved as a PNG with “circle” in its name, transparent outside the shape, in a new dated folder in Downloads › OneMacTools. Use the Preview (eye) button or Show in Finder.
What Circle Crop does
Circle Crop finds the face, centres the circle on it with the amount of room you choose, and saves a PNG that's truly transparent outside the circle. Choose an oval to keep the photo's own shape, a size from 256 to 1024 px, and an optional white or black ring.
Great for
- Make a round profile picture
- Cut out team headshots for a website
- Make round stickers
Options explained
- Shape
- Circle cuts a perfect circle from the photo. Oval (keep the photo's shape) fits an oval to the whole photo, without cropping anything.
- Centre on
- Shown for Circle. The face (automatic) finds the largest face and centres the circle on it. The middle of the photo centres it on the photo instead. If no face is found, the middle is used.
- Room around the face
- Shown when centring on the face: 0% to 100%, 60% by default. Low values crop tightly around the face; high values include more hair, shoulders and background. The circle never extends past the photo's edges.
- Size
- Original, or 1024, 800, 512, 400 or 256 px across. 400–512 px suits most profile pictures; 1024 px is sharp on high-resolution screens.
- Ring
- None, White or Black. A ring around the edge that helps the picture stand out on busy or same-coloured backgrounds.
- Circle (Where I place it)
- Choose Where I place it under Centre on, then drag the circle on the photo in the window and resize it from a corner. It stays a true circle, snaps to the centre, and Reset in the panel puts it back.
Best practices
- Use a photo with the face looking towards the camera. Side-on or partly hidden faces may not be found, and the circle is then centred on the photo.
- Most apps crop profile pictures into a circle anyway. Uploading a round PNG gives you control over exactly what's shown.
- For a set of team headshots, use the same Room around the face and Size so every circle matches.
- Keep it as PNG. Converting to JPEG fills the transparent corners with white.
Works with
- In
- Photos in any format macOS can open.
- Out
- PNG images with a transparent surround and “circle” in the name.
- Choosing a size larger than the cropped area enlarges it, which can look soft.
Questions about Circle Crop
How do I crop a photo into a circle on a Mac?
Drop it onto Circle Crop and click Crop. The face is found automatically, the circle is centred on it, and you get a PNG that's transparent outside the circle.
Is the background around the circle transparent?
Yes. The result is a PNG with true transparency outside the circle or oval, so it sits cleanly on any colour.
What size should a profile picture be?
400 to 512 px covers most sites and apps. Choose 1024 px if you want it sharp on high-resolution screens or for print.
The circle is too tight around my face.
Raise Room around the face. At 100% the circle takes in shoulders and background; at 0% it's close around the face.
Can I make an oval instead?
Yes. Choose Oval (keep the photo's shape) and the oval fills the whole photo, with transparent corners.
Can I add a border around the circle?
Yes. Choose a White or Black ring, drawn around the edge of the circle.
Can I choose exactly where the circle goes?
Yes. Set Centre on to Where I place it and drag the circle over the part of the photo you want. The placement is kept as a proportion of the photo, so it works across a batch too.
Does Circle Crop upload my files?
No. Circle Crop runs entirely on your Mac, so your files never leave it and it works offline.
Will Circle Crop change my original files?
No. Results are saved as new files in a dated folder in Downloads › OneMacTools, and your originals are left exactly as they were unless you turn on an option that says otherwise.
What does Circle Crop need?
Just a Mac with macOS 26 or later. There's nothing else to install.
Do this next
Lift the subject out of a photo into a transparent PNG, on-device.
Resize ImagesResize by longest edge, exact pixels, percentage, or print size in cm, mm or inches at the DPI you need.
Passport Photo MakerPassport and visa photos for India, the US, UK, Schengen, Canada and more, on white, with a print sheet.
Related Images tools
Convert between PNG, JPEG, HEIC, AVIF and TIFF. Reads WebP, RAW and more.
Compress ImagesShrink photos for email and the web, with a live before-and-after preview.
Convert to WebPMake small, web-ready WebP images, lossy or lossless, with transparency kept.
Crop ImagesCrop to an aspect ratio or an exact area, or trim plain borders automatically — one photo or a whole folder.
Rotate & Flip ImagesTurn or mirror photos in one go.
Screenshot BeautifierPut screenshots on a gradient with padding, rounded corners and a soft shadow.

Circle Crop, plus 134 more.
One app. One price.
All 135 tools for $29, once. 14-day money-back guarantee.